How to Connect a Laptop to a Projector
Last Updated on by Daniel Lawrence
Connecting a laptop to a projector can sometimes be tricky. So, we’ve disclosed in this article the basic steps on how to interface a laptop to a projector to project the desktop or use it as a subsequent screen.
How to Connect a Laptop to a Projector
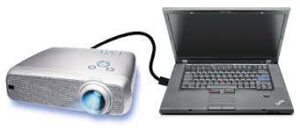
To associate your PC to a projector, you’ll need the PC, the projector, a cable, and any vital connector, as illustrated previously. Whenever you’ve accumulated each one of those things, here are the means by which to connect everything:
- Turn on the PC.
- Join an HDMI link, connector, or VGA link into your PC.
- In the case of utilizing a connector, likewise, plug an HDMI link into the connector.
- Connect the opposite end of your link into the projector.
- Turn on the projector.
- Eliminate the projector cap, and open the projector lens.
- Your projector may not need this progression. On the off chance that the projector promptly extends a picture on the wall subsequent to being turned on, you can avoid this progression.
- Your projector is presently prepared to utilize, however, an extra setup might be required.
On the off chance that you haven’t set up your projector yet, the picture might be foggy. Ensure the picture is clear before you continue.
Do You Need an Adapter to Connect a Laptop to a Projector?
Depending on the ports accessible on your PC, you could conceivably require a connector. Most projectors incorporate an HDMI input port, so you likely will not need a connector if your PC has a full-sized HDMI port. The equivalent is valid if your projector has a VGA input and your PC incorporates a VGA port. In most sometimes, you’ll need a connector. Here are the kinds of ports your PC is probably going to have and a clarification of the connector you’ll have to acquire assuming any:
- HDMI Port: If your PC has a full-sized HDMI port and your projector has a similar kind of port, you will not need a connector. HDMI is the most straightforward approach to interface a projector to your laptop.
- Mini HDMI Port: Also known as HDMI type-c, these are practically indistinguishable from HDMI, simply a lot more modest. You can utilize a link with HDMI toward one side and HDMI type-c on the other or a connector.
- DisplayPort: These are all the more usually on desktop video cards, yet your PC may have one. In the event that it does, you can either utilize an HDMI-to-DisplayPort cable or an HDMI-to-DisplayPort connector.
- USB-C: If your PC utilizes USB-C to output video, you’ll ordinarily have to purchase a dock that incorporates an HDMI port or a USB-C to HDMI connector. A few projectors do uphold USB-C video input, however, in which case you can interface your PC straightforwardly to the projector through a USB-C cable.
- VGA: This is a more seasoned video connector that is restricted to a resolution of 640×480. In the event that your PC and projector both have VGA ports, you can interface them with a VGA cable and no connector. In any case, you will likewise have to utilize a substitute strategy to send sound from your PC to the projector, as VGA doesn’t communicate a sound sign the manner in which HDMI does.
Customize Your Projector Display From Your Laptop
While your projector ought to be prepared to utilize, you may discover it isn’t showing the correct picture, the picture is twisted, or its appearance on your principal desktop when you need it to go about as a different presentation. Here are the means by which to redo your projector show:
- Press Windows key + P to raise the Windows 10 projection menu.
- Select the projection setting you like.
PC screen only: Your projector won’t work.
Copy: Your projector will show exactly the same thing as your PC screen.
Extend: Your projector will go about as a subsequent screen. You may have to change your presentation settings if the picture is extended or crushed.
Second screen only: Your PC screen will close off, and the projector picture will go about as your primary screen.
- Check to ensure the projected picture looks right.
- In the event that the projected picture is extended or crushed, click Start > Settings.
- Click System.
- Snap the display that addresses your projector.
- Change the scale until the projected picture looks right.
You are presently prepared to utilize your projector as an optional or reflected presentation.